Voraussetzungen für eine Aktivierung:
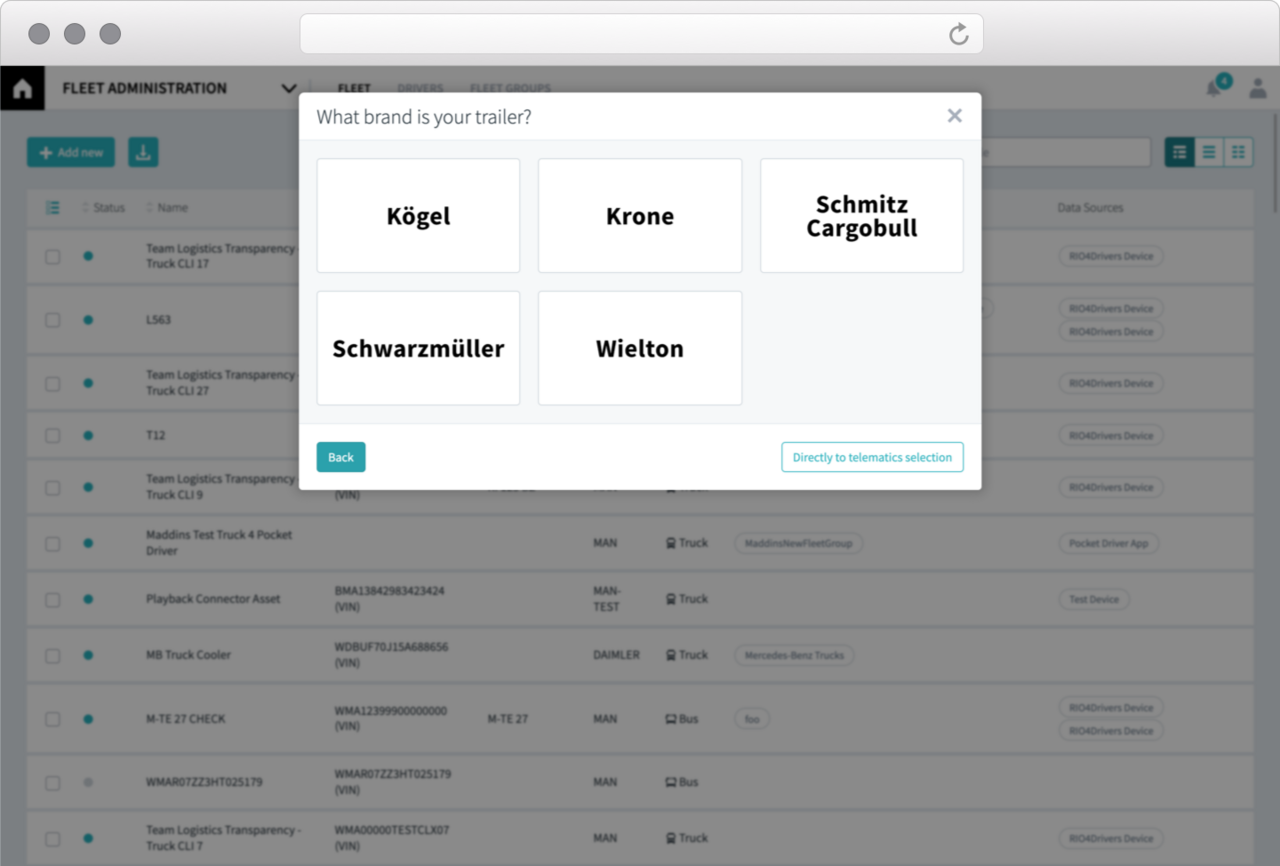
- Sie benötigen einen Account sowohl bei RIO als auch bei Kögel.
- Sie müssen die Daten Aktivierung auf Kögel Seite buchen, damit wir die Daten Ihrer Trailer bei Kögel abrufen können.
- Sie müssen die Rechte eines Administrators im RIO-Konto haben. Nur so haben Sie Zugriff auf die Flottenverwaltung.
Die Flottenadministration
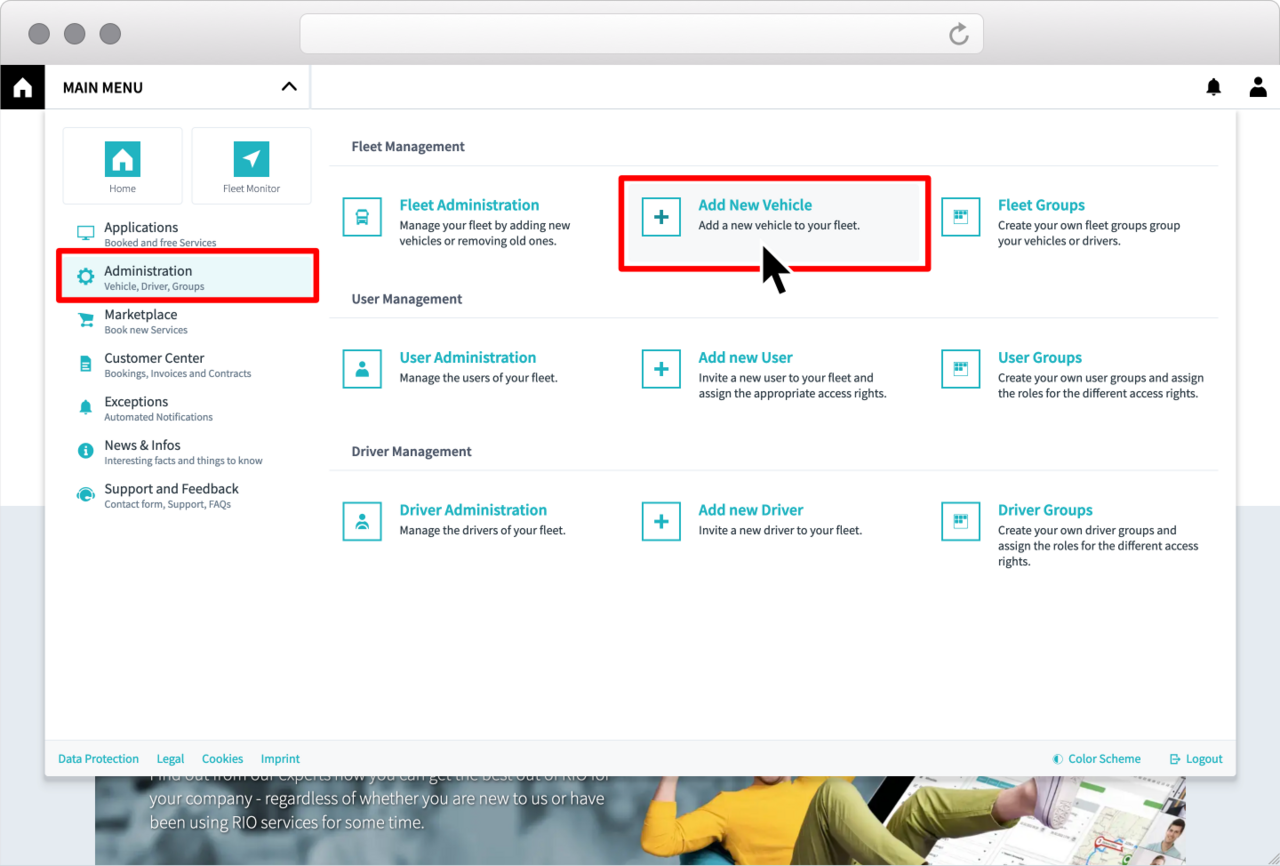
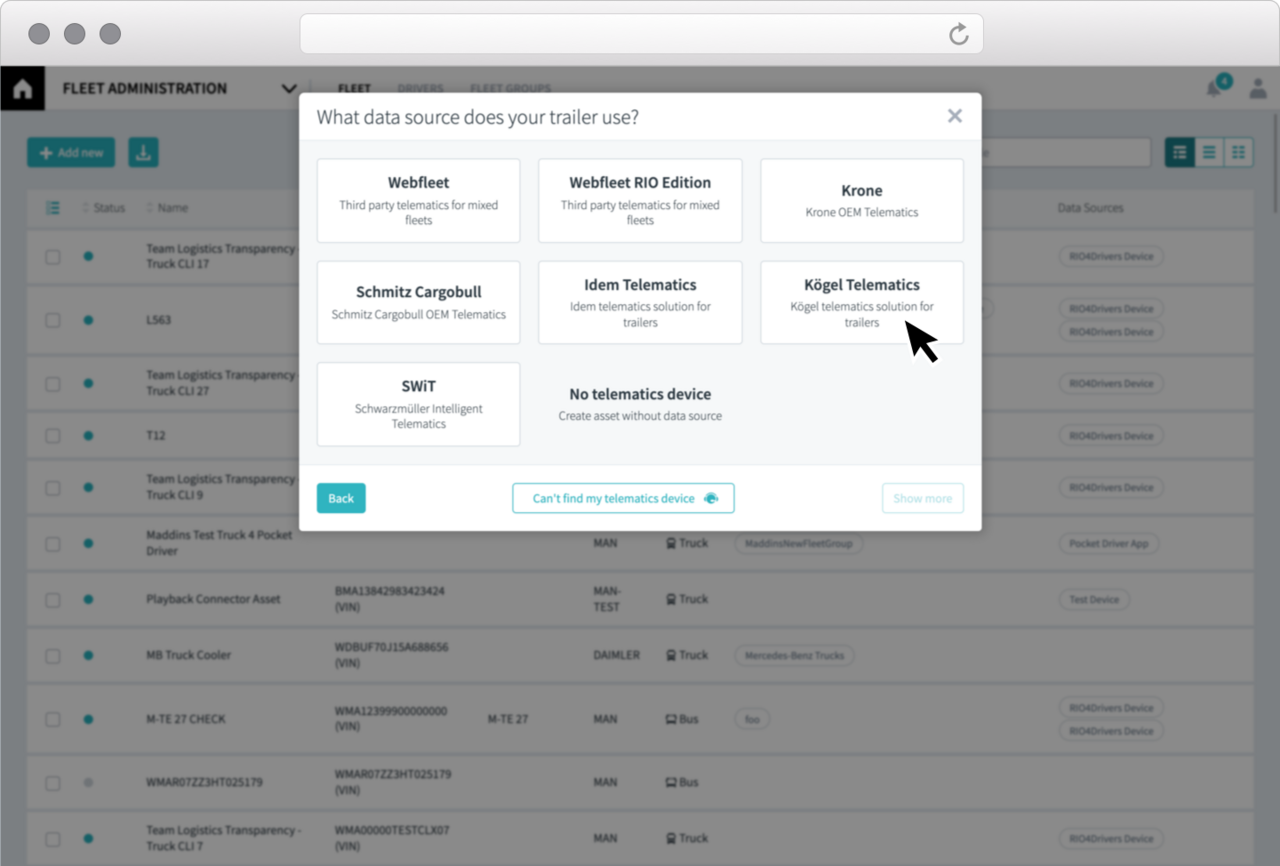
Loggen Sie sich in Ihren RIO Account ein und navigieren Sie über das Hauptmenü zum Bereich Administration und klicken Sie Neues Fahrzeug hinzufügen.